Software
Download the image with the link below and write it to an SD Card ( 8GByte Minimum size) according to this article: https://www.raspberrypi.org/documentation/installation/installing-images/
9/2021 Update 03->04: bugfix Autodetect, added latest hex files for LISY, PBDB and Bally Tester to image
new
Image based on 'pickle'. With this version you can also programm my latest used PIC type'PIC18F45K42'
PCB
Use the Gerber data below and order the PCB at the shop of your choice. (see instructions for ordering at 'jlcpcb.com' here)
Components
Use my Shopping list at reichelt.de. The three burn in sockets ('Nullkraftsockel') are not part of the Shopping list, take a look at eBay to order them. You need one 40pin, one 28pin (slim) and one 20pin(slim) socket.
Documentation
After writing one of my images using 'Win32diskimager' or 'etcher' to the SD card power up the Raspberry with an USB charger (2A minimum). The USB charger will power both the Raspberry and the display.
After 20 seconds or so you should see a 'Welcome' message on the display.
With the buttons you can walk through the menues.
Buttons:
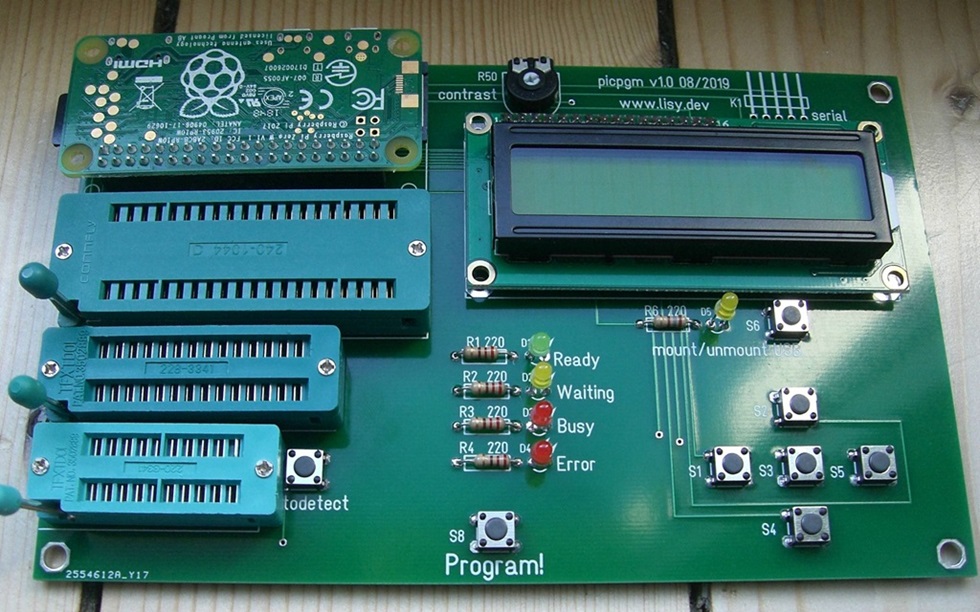
S7 (Autodetect): tries to identify PIC type in socket
S6 (mount/umount USB): mount an USB drive connected to the PI
S3 (OK): read the current directory and show filenames. You can navigate with S2 (UP) and S4(down). By default the content of the directory "/lisy/picpgm" ist listed. You can easily add your hex files to the list by just copy the files to that directory on the SD card.
If an USB drive is mounted the content of that drive is listed.
NOTE: only files with extension ".hex" are listed.
S8 (Program!): program the current selected file into the PIC in the socket
Case
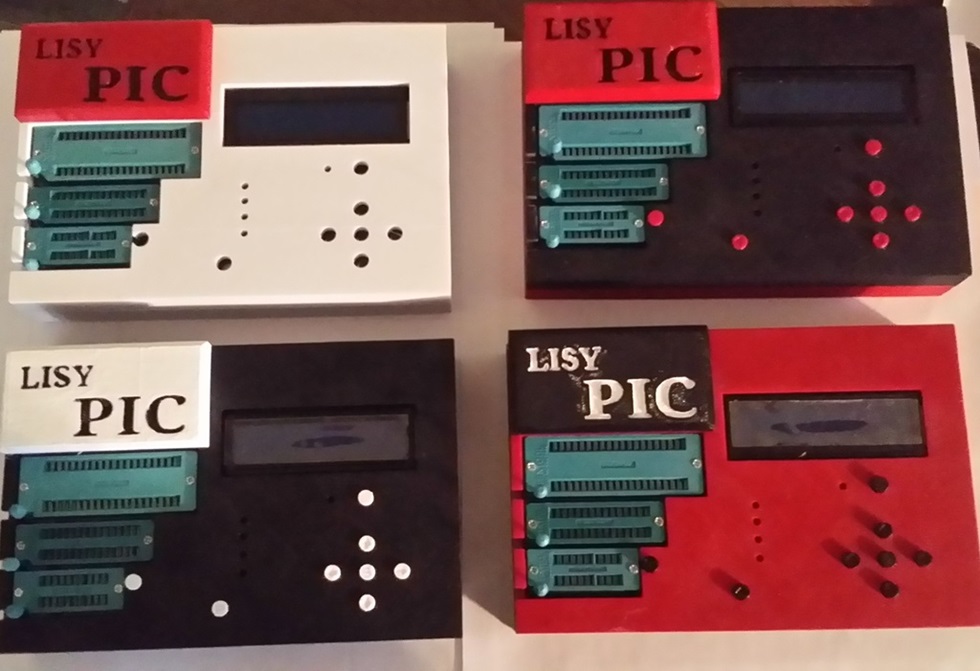
Do you have a 3D printer? Make something usefull ;-), make a case for your PIC programmer.
Find below all you need, all files are provided by Bruce, many thanks for that!


